Brother Luminaire XP3
September 8, 2022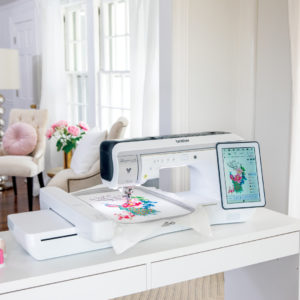
Brother Australia have very kindly given us the opportunity to “play” with the new Brother Luminaire XP3 prototype machine over the last week. This has been such a fabulous opportunity to learn all of the new features of the Luminaire XP3 Model prior to the new upgrade and machine arriving later this year.
I have owned a Luminaire since they were first released – I have a Luminaire XP1 with the upgrade to XP2. We now have upgrade 3 which you can still upload to your XP1 and XP2 machines which is great. But we now also have a new Luminaire XP3 machine due to arrive later this year – so if you are going to run an upgrade on your machine or buy the new one, all of the new features will be available to you.
Having worked with the XP3 closely over the last week I must say how very impressed I am with the new features. I would like to show you some of what I have been able to achieve in a week.
Built In Videos
It is always a good idea to start with watching the built in videos in your XP to watch new techniques, as these will give you an idea of where to start. I also downloaded the XP3 Upgrade Manual so that I had printed instructions to follow.
Edge to Edge Quilting
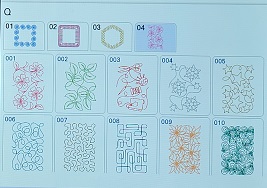
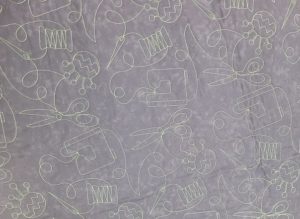
Firstly we played with the new edge to edge quilting feature. There are 10 built in edge to edge quilting designs. After watching the video and reading the instructions I found this process very easy to follow as when the prompts came up on screen I knew where I was heading. The only thing I did differently to the instructions was to turn off the auto trim. This is because I like to sew in my threads and I like to keep a tidy back of my quilt with no birds nests. So by turning this function off, it enabled me to do one stitch and pull my bobbin thread to the top prior to starting to sew. Following the prompts at each stage that come up on the main screen makes this process so easy. Once you have completed the first row you will be confident with the process. I believe that I could complete the edge to edge quilting on a lap quilt of approximately 150cm x 150cm in a day – easily.
The magnetic frame makes the job much easier as you do not have to tape or pin/baste your quilt at all. Just hoop up and off you go. I have no puckers at all on the back of my quilt sample and that is with the first attempt – so I am absolutely thrilled with this feature. To be able to sew edge to edge quilting in embroidery mode on your own quilt with ease is brilliant. Not everyone is able to do free motion quilting easily and this feature takes away all of the stress.
Stitch Tapering Function
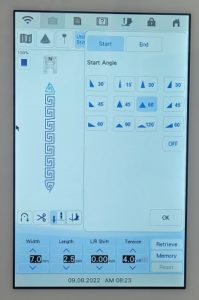
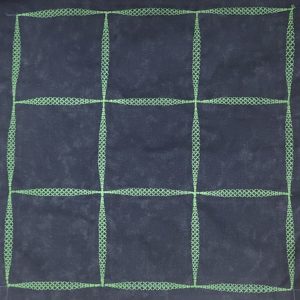
I really like this idea. Once again it is easy to do and is super effective with many design possibilities. Loads of ideas bouncing around my head! See what we did below… now imaging a small embroidery design in the middle of each square – fun! This method can be done using 3 different techniques – I like the end point stickers for accuracy.
Deselect Region Setting (No Sew Setting)
This is really clever. To be able to take a design and delete certain parts of the design that you don’t want is absolutely brilliant. I didn’t have time to stitch out a design here but I did have a good play. Love it.
Embroidering Split Embroidery Patterns
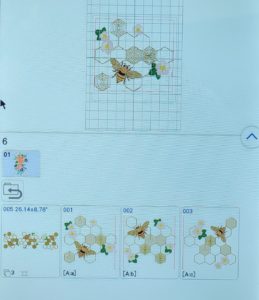
This function is for the new fabulous large built in designs. The XP3 now has the ability to break down a large design into several parts. Following the prompts on screen you can can reposition your fabric and line up the design in your frame ready to start the next part of the design. Some of these built in designs are HUGE, measuring 28″ long. Once again if you watch the video and read the instructions this process just flows.
Embroidery Couching Patterns
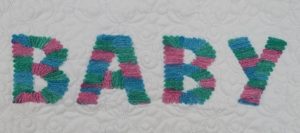
We played with embroidery couching with previous XP models but we now introduce these fun new chunky alphabet designs. Your XP comes with the couching attachment. Being able to couch in embroidery mode is easy as the machine does all of the work for you. Just make sure you use a nice thick 8 ply yarn for this process. Can you see the background fill here? This is one of the new fill designs.
My Design Centre – Additional Fill Patterns
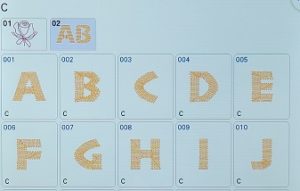
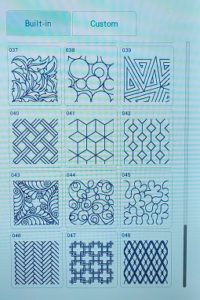
I use My Design Centre a lot. The ease of design on screen without having to use software on my computer gives me just enough design opportunities without being too complicated. I love the background fills and find that when I use them my embroidery work is enhanced with the surrounds. My Design Centre in XP3 now has 48 background fill designs. The new patterns are lovely and will compliment many embroidery projects.
You will see on the top right of my photograph we now have a Custom heading. This is a new feature where you can design your own fill stitches in PE Design 11 and import them. This opens up a whole new world of custom design for your projects.
Long Stitch Designs
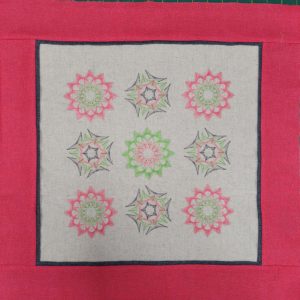
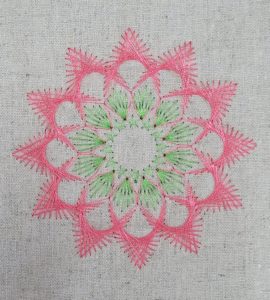
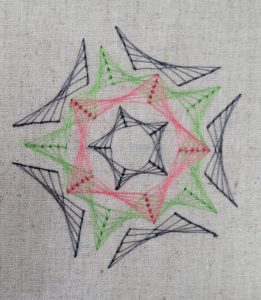
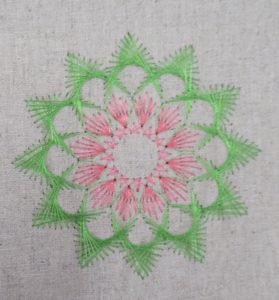
Now these are something very special. Looks a lot like the spirograph we used to do as kids! Absolutely fascinating to watch the embroidery machine stitch these designs out. There are some lovely designs for this process. These below are my favourite.
New Designs
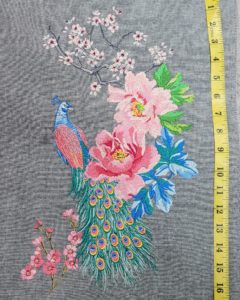
There are some gorgeous new embroidery designs in XP3. This lovely peacock I just had to stitch out on a table runner. It is stunning. Look at the size of this design.
New Applique Designs
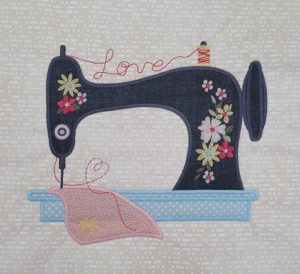
Do you use your ScanNcut when doing in hoop applique? If not, you really should. There are some new designs added to the XP3 that are perfect for use with the ScanNcut. This makes the applique process easy as you no longer have to cut away the excess fabric after the machine has done the tack down stitch. Simply apply your fusible web to the back of your fabric and place on the cutting mat, send the design to the SNC and it will cut it out perfectly ready to set into your design. No more tricky cutting away. How adorable is this new design?
New Stylus
This new stylus is so nice to use. Just like holding a pen, so much easier to hold. The touch is sensitive and very responsive on screen. Very happy with this new addition.
Summary
My overall opinion of the new XP3 is that it really is a fabulous machine. There are many new features that are what I call ‘usuable features’. So many new things to play with! I believe the upgrade is well worth the expense for the features that it offers. I have had a great time over the last week learning what more we can do, who even thought there would be more as the XP has always offered so much.
Using the built in videos and the downloadable upgrade manual the new features are easy to use. There has been nothing complicated about any of the things I have done over the last week. I found all instructions clear to follow and everything I did had WOW. There was no frustration in any part of any process.
Of course at Bellarine Sewing Centre we continue to run classes with these machines to keep you all up to date with the new features.
We are all very excited about this new upgrade for the XP3 and are so pleased with everything it has to offer.
If you are thinking about upgrading your embroidery machine why not call in store and have a look at the samples we have stitched out and spend some time with us learning about the Brother Luminaire XP. Shopping local not only helps your local community but it also gives you FREE hands on tuition in store with your machine.
Trade In Machines
If you are wanting to purchase an XP1 (with upgrade to XP2) we have two trade in machines available from customers who are purchasing the new XP3 machine. Please call the shop for further information.
